
The calendar says it’s now officially spring, and here in the Rouge River watershed area we’re having some warm, sunny days enticing us outside.
You may be accustomed to “cleaning up” the garden beds this time of year. You may be eager to work outside on a sunny day. However, this is a friendly reminder that your pollinators and beneficial insects are still dormant inside brown plant stems and under fallen leaves. To protect these important and imperiled insects, you want to wait until after we get a full week of temperatures that go above 50 degrees F before spring cleaning. After that, most of our insect allies will be hatched out and starting their busy season, and you can be confident you’re not harming anyone.
Well then, what’s an energetic gardener to do on a sunny day? One option, if you don’t have one already, is to start a composting system in your yard!
Composting
- Gives you a free fertilizer and soil conditioner for all plants
- Reduces your waste going to the landfill or incinerator
- Reduces the amount of methane going into the atmosphere from landfills
- “Involves minimal effort, equipment, expense, and expertise”1
- Is fun for the whole family!
In the United States, we throw away nearly 80 billion pounds of food each year, equal to 30-40% of our total food supply! That’s 219 pounds of food waste per person. Food takes up more space in our landfills than anything else – 22% of municipal solid waste. When we compost at home, we can reduce our garbage going to the landfill by at least 30%! 2,3,4
If you just throw food scraps on the ground outside instead of the garbage, you will be diverting waste and decomposition will happen! However, composting is the art and science of creating the highest-quality compost, in the least amount of time, with the least effort, while avoiding the most common problems.
There are different methods of composting, depending on your preferences. Here is a mini-guide showing you how to make your own “black gold.”
Get Worm Friends to Help
If you like to go fishing, or if you want to adopt several hundred wiggly pets, vermicomposting may be the method for you. This is composting with earthworms! The resulting “compost” is called earthworm castings, and it is a very rich soil amendment. You can buy a specialized vermicomposting bin or make your own. Earthworms have special needs, just like anybody else, so please don’t begin without researching first. (Hint: they need a climate-controlled environment and they don’t like onions). A classic tiny “textbook” of vermicomposting is Worms Eat My Garbage, by Mary Appelhof.
Just the Scraps
The more traditional method of composting is outdoors, transforming food scraps, leaves, paper products, and even pet hair into compost – the basic ingredient of a successful garden soil!
First, we’ll look at the ingredients, then the simple science and “how to,” and finally how to choose the container where it all happens.
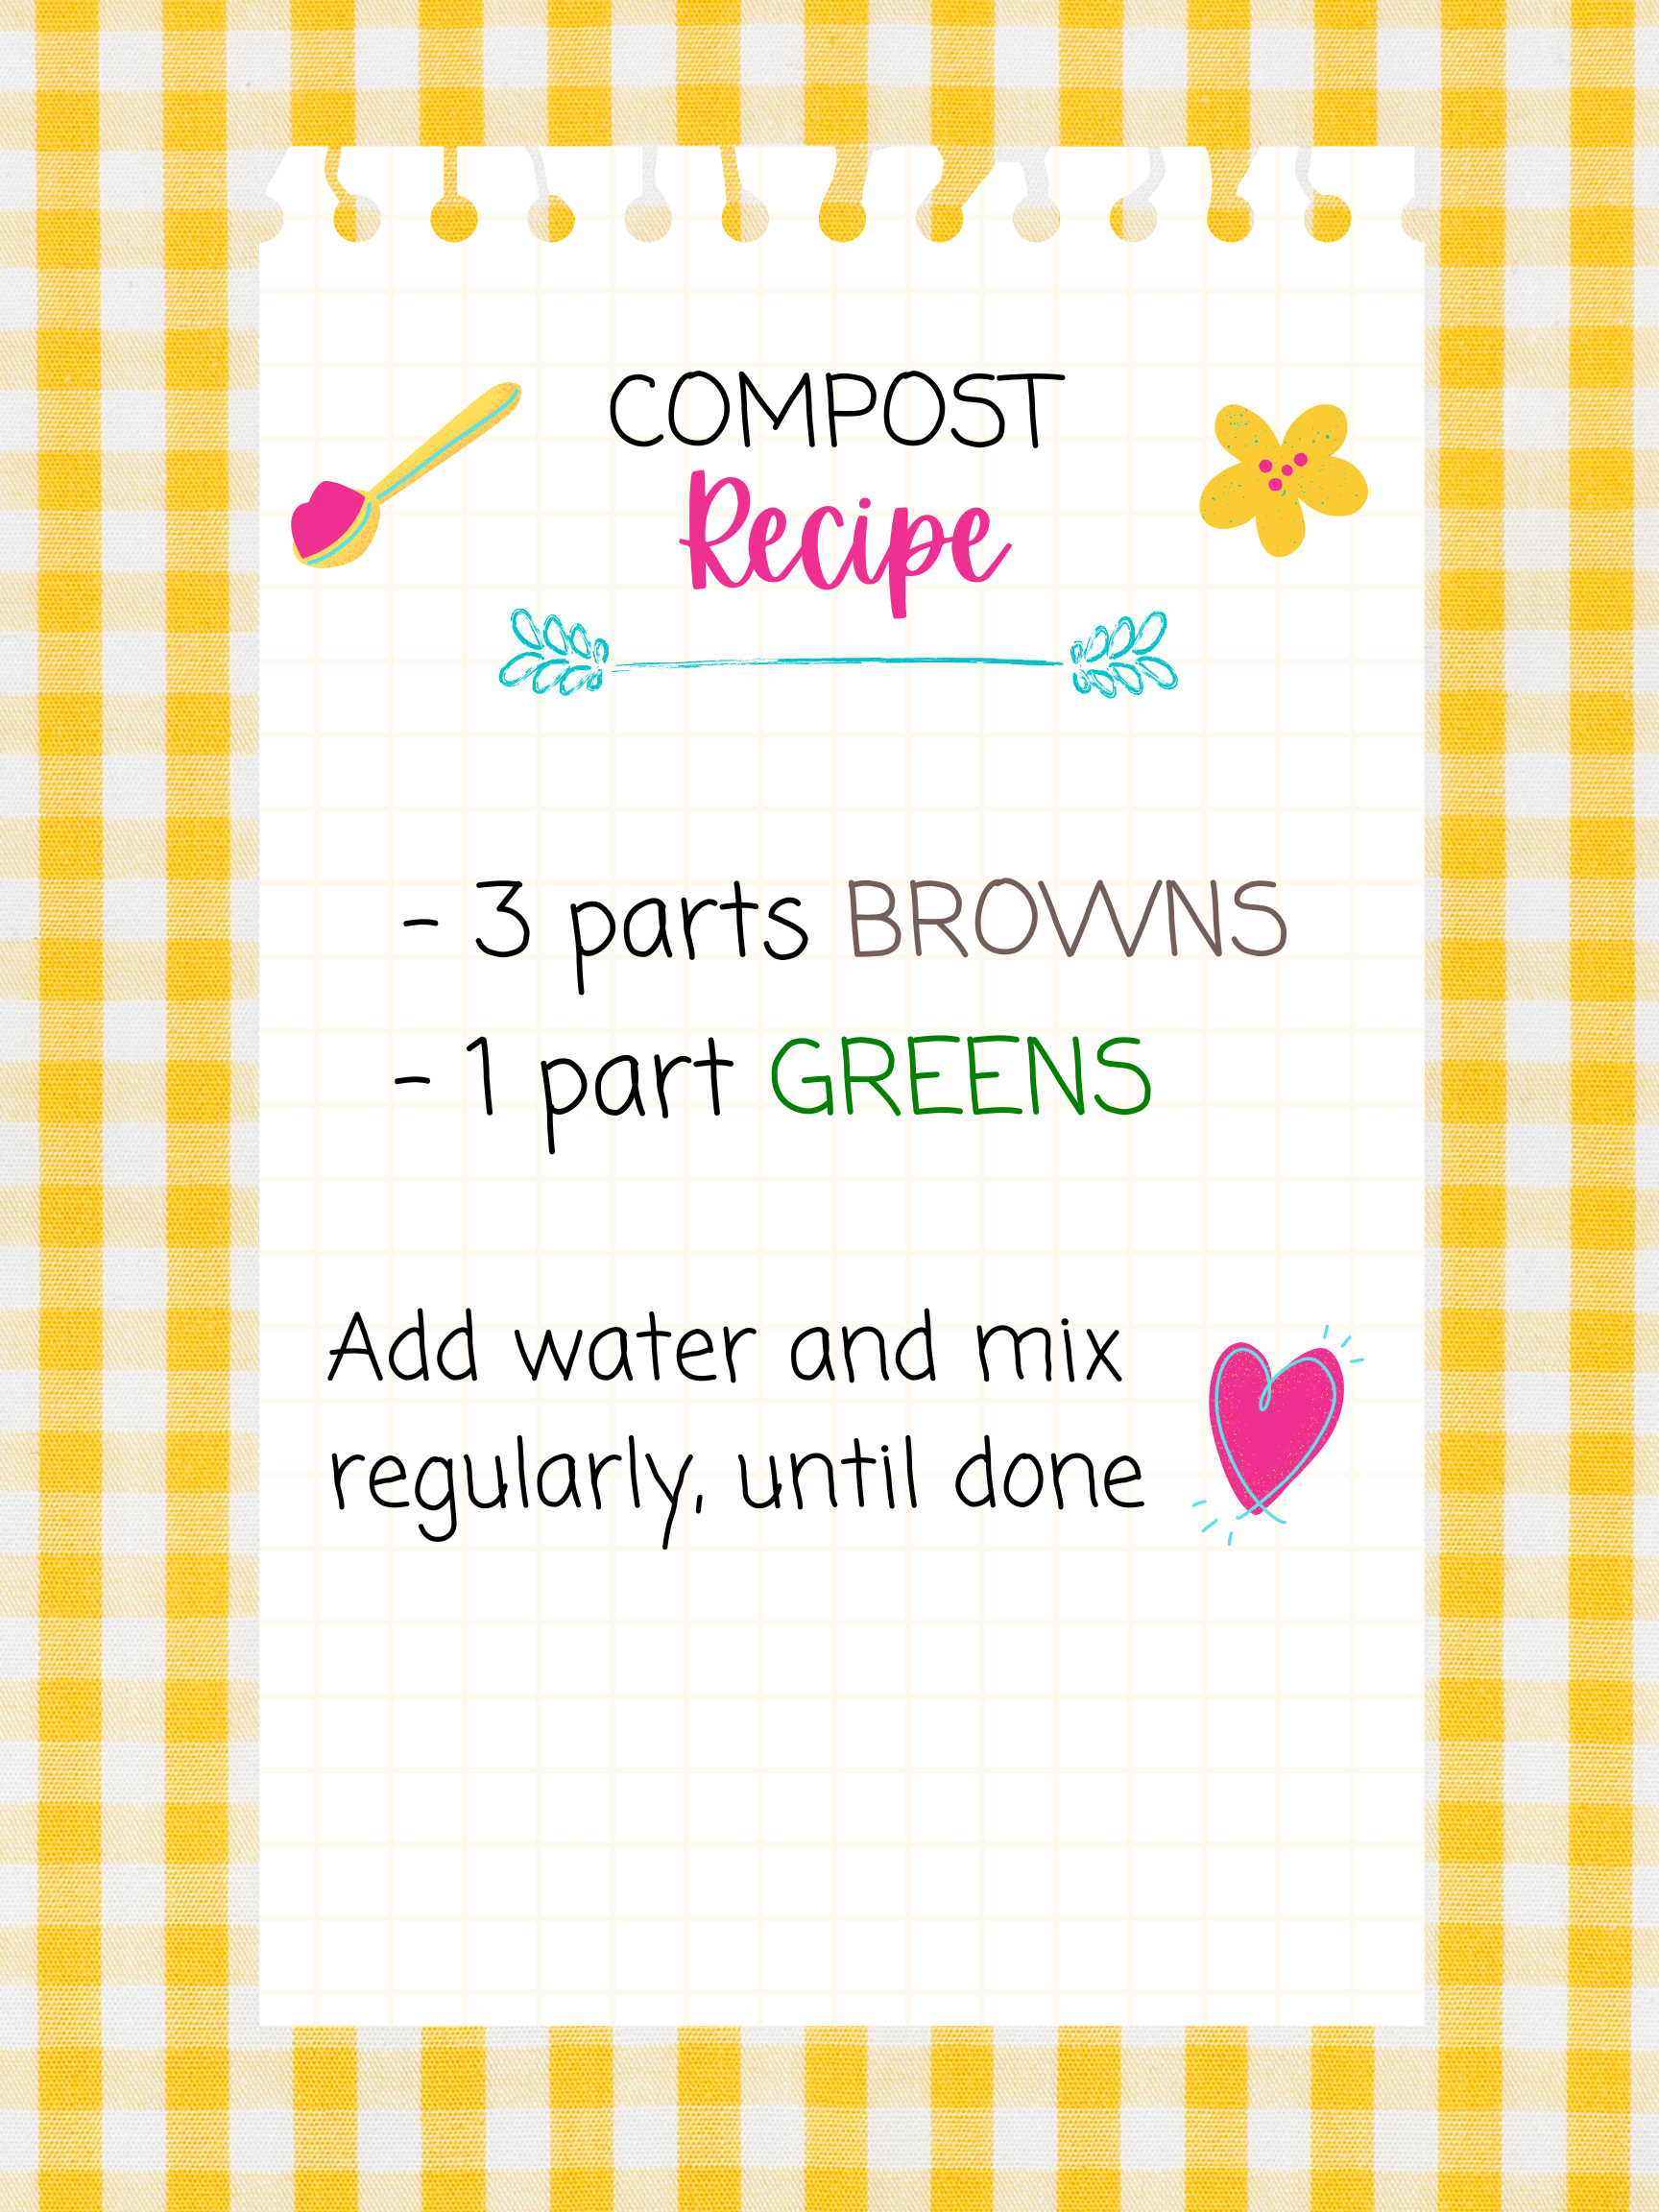
“Browns” are high-carbon ingredients. This includes dead grass, brown leaves, natural (undyed) mulch, wood shavings from untreated lumber, straw (not hay), paper products – such as paper towels and pizza boxes, and natural fibers – such as wool and cotton, and pet and human hair.
“Greens” are high-nitrogen ingredients, including most of your kitchen scraps, such as fruits, vegetables, vegetarian leftovers, green grass, plant clippings, and coffee grounds.
Crushed egg shells contribute neither carbon nor nitrogen, but may also be added.
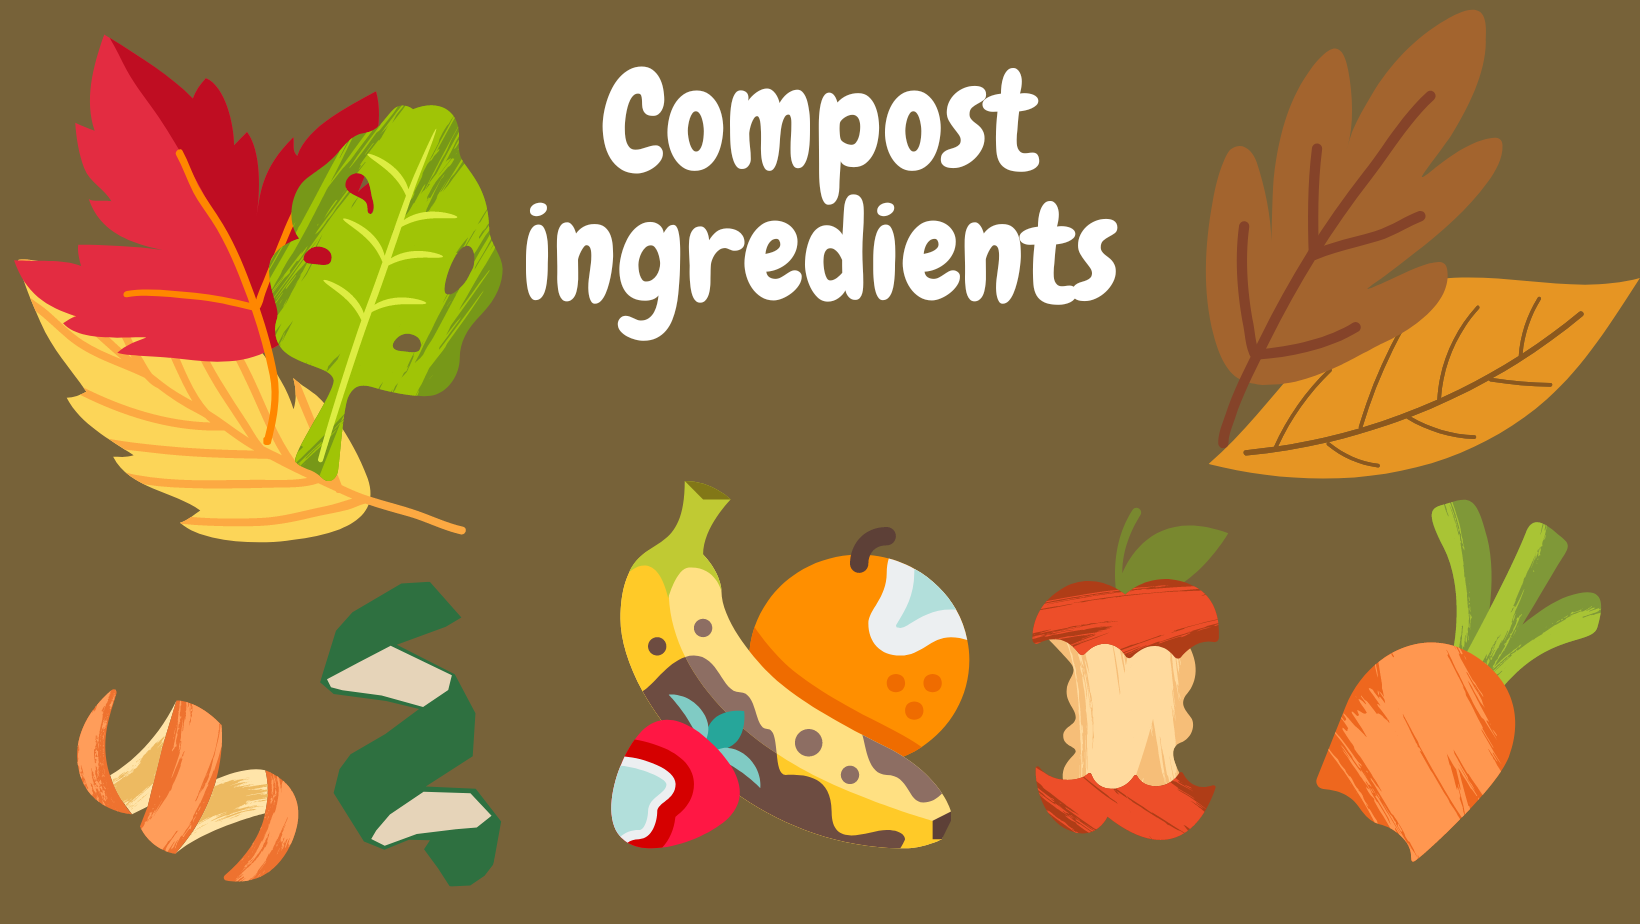
Don’t compost any of the following: Meat, dairy, oils or greasy foods, glossy paper, weeds, pet feces, glossy paper, hay, plastic, glass, metal, sawdust or wood from treated lumber, or plant material that is diseased or has been treated with pesticides.
Unlike vermicomposting, in traditional composting beneficial microorganisms are doing the work of turning your waste into black gold. That’s another reason why compost is so good for our gardens – these microbes are crucial for plant health.
As the human-in-charge, you get the best results if you remember you are caring for innumerable invisible “pets.” They need food, water, and air to survive. The browns and greens, in a three-to-one ratio, are food for microorganisms. As the microbe-farmer, you need to water the compost to provide moisture, but without drowning your flock. (The moisture level should be like a wrung-out sponge). Finally, you need to aerate the ingredients to bring in more oxygen to the center of the pile.
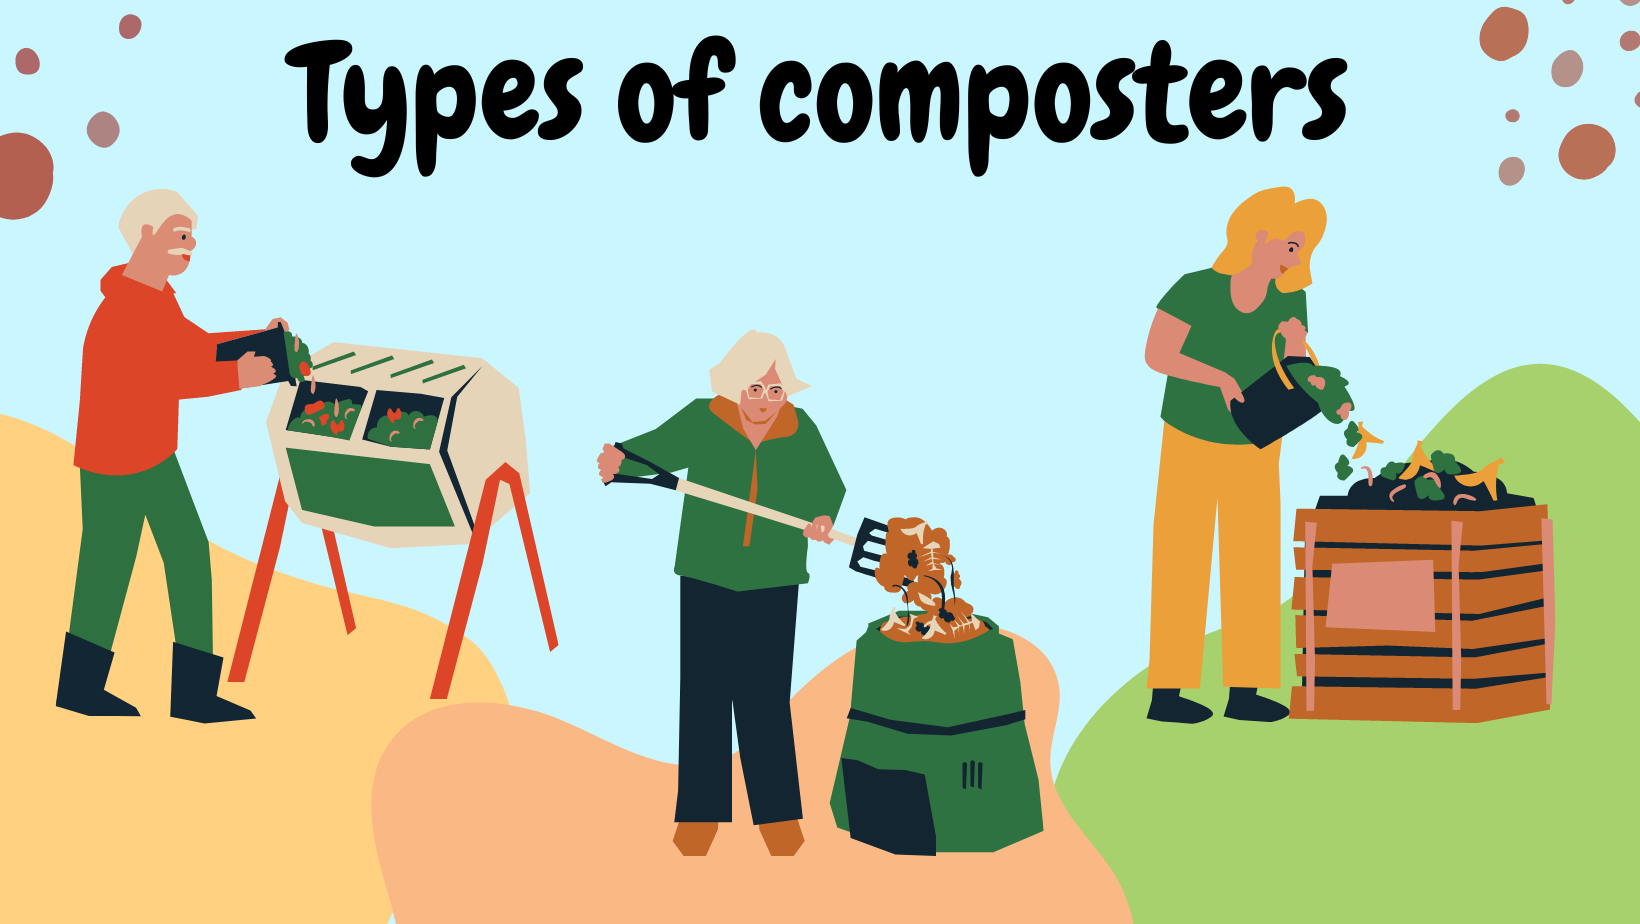
Best Composting Containers
The easiest and least expensive composting system is simply a pile of ingredients on the ground. One upgrade would be a wooden structure you build yourself (made from lumber or discarded pallets) or a cylinder of welded wire. The downside of these methods is that they may be unattractive, and susceptible to rodents and other scavengers. However, a homemade wooden bin could be designed to be rodent-resistant if you keep in mind that mice can fit through a hole one-quarter inch wide and larger. If walls, lid, and bottom of your homemade bin have joints and aeration holes that are too small for access, then it can be rodent-resistant.
The next-level composter is a store-bought wooden or recycled plastic stationary bin. Some are designed to be rodent-resistant, and some are not. Check out Friends of the Rouge’s Upcycle Stationary Composter for sale now- pickup in May!
The “Cadillac” of composters is a tumbler – a barrel on a stand that is easy to rotate. Check out Friends of the Rouge’s Upcycle Tumbling Composter for sale now- pickup in May!
Where to Place your Composter
Make it close enough to the kitchen so that it’s convenient, but out of sight if you’re worried about the appearance. You can have a smaller bin in your home that you can later transfer the contents into your larger pile or bin.
How to Compost
For a stationary composter, start by placing about 6” of coarse material (twigs, coarse mulch, etc) at the bottom. Then add an ample layer of browns. Every time you add kitchen scraps, immediately cover them with brown material. (Have a pile of brown material handy nearby). Leaving kitchen scraps exposed is an invitation to flies and other pests. Keep layering like this every time you add new material.
To aerate, some of these designs make it easy for you to use a garden fork or a pitchfork to dig in and turn over the ingredients. For some of these designs, like the welded wire cylinder and a plastic bin with a narrow top, it would be impossible to aerate with a fork, so you will need a compost aerating tool. The tumbler is clearly the winner regarding ease of turning/aerating.
Depending on weather, ingredients, and your investment of time and energy, you can have finished compost in less than a month, or more than a year. The most frequently you should aerate or turn your compost is every 4 – 7 days – this will get you finished compost the soonest. If you mix it up too frequently, your microbes won’t have a chance to settle in and have a good meal before they are disrupted again. If you aerate less frequently, decomposition will still happen, but just not as fast. You know your compost is working when it literally gets warm or hot in the center – all those little microbe bodies are working hard and creating body heat!
If you maintain the ratio of brown to green; if you maintain the oxygen by turning the pile at least once every two to four weeks, and maintain proper moisture (by watering it if it’s dry, and covering the bin before really heavy rainy spells), your composting venture should be a success. However, even the most attentive compost parent can run into problems, so here is a troubleshooting guide:
https://cceniagaracounty.org/resources/compost-troubleshooting-compost-piles
At some point you will realize that part of the compost is finished, while you keep adding new scraps. You have a couple of choices here. You can sift out the finished compost using ¼” – ½” hardware cloth, or start a second compost bin, maintaining both compost bins but halting new scraps in the first bin until it’s completely finished.
How can you tell it’s finished? Finished compost will smell earthy, not like rotten vegetables. It will look like a beautiful dark brown soil, and have a fairly uniform texture with none of the original kitchen scraps visible.
There are so many do-it-yourself compost system designs online. If you are a D-I-Y-er, have fun finding the one that suits your style. Here’s a clever system that covers a lot of the steps in composting, including the final sifting.
No matter how you choose to compost, you will still be benefiting our environment by diverting waste out of the landfill and creating an organic fertilizer you can use for anything from houseplants to oak trees. You will also have a place to put all of those dry plant stalks and brown leaves, after your pollinators have hatched and the season has really begun.
Happy spring and happy composting!
- https://www.epa.gov/recycle/composting-home#whycom
- https://www.rts.com/resources/guides/food-waste-america/
- https://www.usda.gov/foodwaste/faqs
- https://www.feedingamerica.org/our-work/reduce-food-waste
Categories
-
 BlogRead the latest blog posts from your FOTR team.
 -
News & EventsLearn more about upcoming FOTR events and projects